

As organizations continue to modernize their data infrastructure, upgrading to SQL Server 2022 is quickly becoming a strategic move. With enhanced security, performance improvements, and advanced analytics capabilities, SQL Server 2022 offers significant advantages over its predecessor. (How to migrate SQL Server 2019 to 2022?)
However, a successful migration isn’t just about clicking “Install“—planning, preparation, and precision. This comprehensive guide walks you through every step of migrating from SQL Server 2019 to 2022. This guide ensures a smooth and secure upgrade from verifying prerequisites and configuring service accounts to installing updates and applying best practices. Whether you’re a DBA planning your next deployment or an IT professional managing SQL Server environments, this post will help you avoid common pitfalls and make the most out of your SQL Server 2022 installation.
Read More: What You Need to Know About SQL Server 2022?
1. Permissions for Installation Account & Service Account:
This is one of the important parts to decide while installing or migrating a SQL Server. As per the Microsoft documentation, always prefer MSA (Managed Service Account) for standalone servers and gMSA (group Managed Service Account) with the lowest possible user rights to run the SQL Server service.
If in case you can’t use an MSA or gMSA account, use a user account or domain account with the required permission to run the SQL Server service on the service. Prefer separate accounts to separate SQL Server services. It’s a good practice to grant permission through group membership, but it does not mean you can’t grant permission directly to the account.
1.1 Windows privileges and rights (Installation vs. Service Accounts)
When we speak about the SQL Server 2022 installation, we deal with 2 accounts: 1st one is your account using which you are going to install the SQL Server and 2nd account is to run the SQL Server service in your Windows Server.
| Sr. No. | Account | Example |
|---|---|---|
| 1 | Installation Account | Domain\your_account |
| 2 | MS SQL Server Service Account | SQL Service account |
On the SQL Server, the installation and SQL service account should be added to the following local groups. If you are going to use a cluster then make sure these permissions are defined on all nodes.
| Log on as a Service | Local Group | SQL Service account | Setup\Installation account |
|---|---|---|---|
| 1 | Administrators | ✓ | ✓ |
| 2 | Log on Locally | ✓ | |
| 3 | Log on as Service | ✓ | ✓ |
| 4 | Log on as Batch Job | ✓ | ✓ |
| 5 | Adjust memory quotas for a process | ✓ | ✓ |
| 6 | Impersonate a client after authentication | ✓ | |
| 7 | Audit Admins | ✓ | |
| 8 | Debug programs (*) | ✓ | |
| 9 | Act as part of the operating system | ✓ | |
| 10 | Replace a process level token | ✓ | ✓ |
| 11 | Bypass traverse Checking (*) | ✓ | |
| 12 | Lock pages in memory | ✓ | ✓ |
2. Server prerequisites
2.1 OS Requirements (Windows Server)
The minimal OS edition for SQL 2022 is Windows Server 2016 or higher.
2.2 Memory Requirements
The strict minimum for a server running SQL 2022 or above would be to have 4GB of memory dedicated to SQL. Consider that if additional roles will be collocated on the same server (SSRS, SSIS, SSAS) additional memory would be necessary. (How to migrate SQL Server 2019 to 2022?)
2.3 SQL Server 2022 Software Prerequisites
The following software should be installed on the server before the installation of SQL 2022:
- Microsoft .Net Framework 4.7.2 (Activate Windows Server feature and dependencies in Server Manager).
| TIPS: 1. SQL Server performs I/O operations in multiples of 8 KB pages, with an extent size of 64 KB (8 pages x 8 KB each. Using a 64 KB allocation unit size ensures that SQL Server can efficiently manage extents without splitting them across clusters, reducing fragmentation and overhead. 2. Installation of SQL Server is supported on x64 processors only. It is no longer supported on x86 processors. |
2.4 MSDTC service
MSDTC is used by SQL Server and other applications when they want to make a distributed transaction between more than one machine. The DTC is a service that coordinates transactions that span multiple resource managers, such as databases, message queues, and file systems. If this service is stopped, these transactions will not occur.
The DTC is provided as a standard service with the Windows Server 2008 operating system but does not start up automatically as a service.
3. SQL 2022 INSTALLATION
This post covers the installation process for a Standalone SQL instance:
3.1 Preparing the Installation Media
Make sure the sources are for the correct edition of SQL (Standard, Enterprise, …), in case the source comes as a .iso package, this can be directly mounted as a drive.

Also, copy the sources for the latest Service packs and Cumulative updates that are available for this version of SQL.
3.2 Running the Installer
Step 1: Right-click on “Setup.exe” and choose “Run As administrator”.

| Tip: Make sure that the admin account performing the installation is a member of the required local groups as detailed in the prerequisite section of this guide! |
Step 2: The SQL Server 2022 Installation Centre screen appears. This opens the ‘Planning’ tab.

Step 3: Verification step: Optionally to verify that all prerequisites are met to install SQL 2022, the “System Configuration Checker” in the ‘Planning’ section can be launched before proceeding.
Step 4: Click on the Installation page and then on ‘New SQL Server stand-alone installation or add features to an existing installation.’

Step 5: Validate the product key

Step 6: Review & accept the license terms, click next.

Step 7: The global Rules check will kick in on the next screen. If all is OK, the installation will proceed to the update section. If it does not, re-check the server and installation account prerequisites.

Step 8: Microsoft Update: On most deployments make sure the MS Update box is unselected. (The server does not have access to the internet, and the patching will be done later in this deployment guide).

Step 9: Click Next – the ‘Product Updates’ tab will be skipped.
Step 10: Click next on the Install Setup Files. The files needed for the installation are copied. This takes a few minutes.
Step 11: Install Rules: Review that all rules Passed.

Warnings are acceptable for MS .NET Application Security and for Windows Firewall.
| Note: In case some of the Rules FAILED, installation cannot proceed. The first thing to check is that the installation account has the correct permissions on the server. (See the prerequisites section at the beginning of the SOP). |
Step 12: Next, select the features to install on this Instance of SQL. Each server might have a different set of features needed. This installation guide will only select the default ones for the basic DB engine.

Feature selection for a basic SQL server:
- Database Engine Service
- Full-Text and Semantic Extractions for Search
* (can be skipped on future-only or dedicated instances)
Step 13: Instance Configuration
13.1 Instance name: typically, the Default instance is used for SQL installation “MSSSQLSERVER”– but on dedicated SQL servers, a named instance can be used as per business needs. If a default instance is already present on the server, we can only install a named instance. Provide an appropriate name for the named instance. (How to migrate SQL Server 2019 to 2022?)

Server Configuration > Service Accounts.

Browser and select managed service account for the SQL server database engine and SQL server Agent as well as any other service deployed on that instance.
If a Service account or MSA has already been created, it can be assigned now to run the service (but ensure the group membership for the account from the prerequisites has been assigned).
| 1. During installation, the default local accounts can be kept for SQL services, alternatively (they will be changed later). 2. For clustered installation, leave all start-up types to Manual (the cluster will take care of starting services). 3. Check the box to grant Volume Maintenance Task to the service account for the DB engine. This will perform when auto-grow is needed. 4. If this is selected, make sure the service account that will run the SQL services is a member of the local admin group. |
Performance improvement vs. security risk of this feature needs to be considered. See this link for details
Next, click on the Collation tab.
Server Configuration > Collation

For most installations, the default collation should be kept.
(SQL_Latin1_General_CP1_CI_AS).
Database Engine configuration (part 1)
In the Server Configuration section: Choose Mixed Mode authentication.
Generate a strong password for the sa account. This password should be stored in your official password management tool. The username will be changed later for extra security.

Database Engine configuration (part 2) : Data Directories
In Windows Server 2012 and above, NEVER select the root of any drive as a location to save files, always create a folder.

Database Engine configuration (part 3) : TempDB
As of SQL 2016, TempDB drives can be configured during server setup.

Adapt the # of TempDB Data files based on the environment based on the following rules:

Change the directory of the TempDB Data to as per your standard.
This interface allows to set the correct number of files, but the actual size of the TempDB data and log files will be set later in this SOP.
- Number of files = [Match the number of Logical Processors on the server]
- Initial size (MB) = [Set number so that the total fills up 60% of the TempDB data drive e.g.: if your drive is 100GB, set size to reach 640MB.
- Auto growth (MB) = [make sure Total auto growth + Total size is < than the total size of the TempDB data drive. Keep it to 64MB if the Volume Maintenance Task option is set.
For the TempDB Log file settings, change the directory of the TempDB Logs to your standard.
- Initial Size (MB): The system will warn if a too-big file is set. The max to set is 256GB.
- Autogrowth (MB): Set size to allow auto-growth of the TL log without surpassing the drive size (default: U drive).
Keep to 64MB if the Volume Maintenance Task was set. (How to migrate SQL Server 2019 to 2022?)
Database Engine configuration (Tab 4): MaxDOP
The MaxDOP is the Maximum Degree of Parallelism which determines the number of cores to utilize for this instance.
The # of cores available should be automatically detected by the setup and MaxDOP aligned.

In some instances, this value should be overridden to another value. (eg: SQL dedicated for SharePoint, MaxDOP should be set to 1).
| NOTE: For SharePoint Server Subscription Edition (SE), Microsoft recommends setting the Max Degree of Parallelism (MAXDOP) for the data tier (SQL Server) to 1. Why Set MAXDOP = 1 for SharePoint SE? SharePoint databases are highly transactional and designed for OLTP-style workloads. Parallelism can cause excessive CXPACKET waits and degrade performance in SharePoint environments. Microsoft’s official best practices recommend disabling parallel query execution to ensure consistent and predictable query performance. |
Database Engine configuration (Tab 5): Memory
It is best to leave at least 4GB of memory free for other processes running on the server. Even more, if this SQL instance will host other services.

Analyse the amount of RAM, subtract 4 GB and set the remaining value for Max Server Memory (MB).
Eg: on a 32 GB system, max mem will be set to 28 GB
This value is usually correctly estimated by the setup. Make sure to check the ‘Click here to accept’ checkbox.
Database Engine configuration (Tab 6): FileStream
In most instances: leave FileStream disabled.

Feature Configuration Rules
Setup is running rules to determine if the installation process will be blocked, if everything is green and the status is passed you are good to go.

Ready to Install
Review the summary. Click Install when ready.

Note: The configuration file path will be mentioned in this window, the file name will be “ConfigurationFile.ini”. The default location will be shown there.
Wait for the installation of SQL to complete.

Congratulations, your SQL Server 2022 has been installed successfully.

You can check your Summary log file at the given location. (How to migrate SQL Server 2019 to 2022?)
Install Latest Service Pack and Cumulative Update
Please download the latest patch and install it. When we were installing the MS SQL Server 2022 the Windows Latest Cumulative Update Package 18 was available. So, we are installing CU 18 here:
Step 1: Download the Cumulative Update Package 18 for SQL Server 2022 – KB5050771
Step 2: Move it to your standard disk drive location for the installation.
Step 3: Right-click on the Setup file and run it as administrator

Step 4: Accept the license terms and click on Next

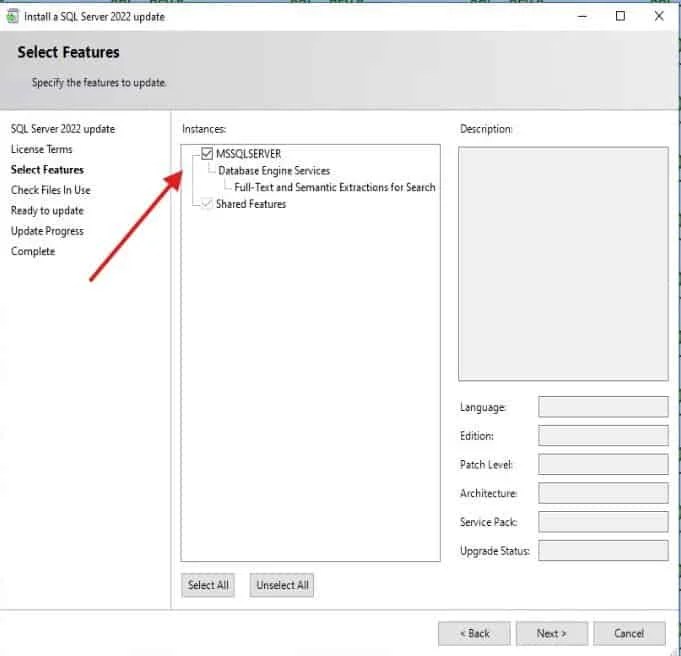
Step 5: Select Features and click on Next
Step 6: It will check files in use, it should be green and then click on Next

Step 7: Check the Summary and click on Update

Step 8: Monitor the progress
Step 9: Your SQL Server 2022 is successfully updated with the CU 18.

Installation of SSMS
SQL 2016 and above do not embed the SSMS client anymore, but sources can be freely downloaded from here.
Post-Installation clean-up
Account clean-up check:
– Delete the installation account from all local groups on the server
– Remove the Network Service account from the Local admin group
– Revoke the ‘Full Control’ permission of the installation account.
Service Account and services Delay Start
As of MS SQL Server 2022, this the services are automatically started with delay even if the ‘Automatic’ option is set.
If installation was done keeping the default local accounts, swich to dedicated svc accounts or MSA.
Ensure that the service account is member of the required local group (see prerequisites).
The service account should also be a member of the local Admin group, you can set it by GPO as well.
Disable Named pipes
If you are using the default server name, then it is good practice to disable the Named Pipes setting in the SQL Server Configuration Manager.
Go to Start | All Programs | SQL Server 2022 | Configuration Tools | SQL Server Configuration Manager
Right click and select ‘Run as administrator’.
Expand “SQL Server Network Configuration“
click on “Protocols for MSSQLSERVER“
Check that these settings are applied:
- Shared Memory: Enabled
- Named Pipes: Disabled
- TCP/IP: Enabled
Disable SQL CEIP (Customer Experience Improvement Program)
With SQL Server 2016, Microsoft is installing SQL Server Telemetry or CEIP (Customer Experience Improvement Program) Services by default. It sends feature usage info back to Microsoft. You cannot skip the installation of these services; it can be disabled at this stage. (How to migrate SQL Server 2019 to 2022?)
(Not needed on most SQL instances which anyway do not have access to Internet).
If the SQL Server CEIP Service is running, go to start and launch the “SQL Server [edition] Error and Usage reporting” tool.
Upon next server restart, the service should remain Not Running – for additional clarity, the “SQL Server CEIP Service (MSSQLSERVER)” service can be switched to ‘Disabled” and stopped on the server.
Disable XP-CMDshell
To avoid potential security risk, you can and should disable xp_cmdshell in SQL Server 2022 if it’s not needed.
What is xp_cmdshell?
xp_cmdshell is an extended stored procedure that allows execution of operating system commands from within T-SQL.
How to Disable xp_cmdshell in SQL Server 2022?
You can use sp_configure to disable it:
Run the following query to allow advanced options to be shown:
SQL Code:
EXEC sp_configure 'show advanced options', 1;
Check the current settings:
Sp_configure;
Xp_cmdshell should have a run_value set to 0.
If XP_CMDSHELL is set to run (1), disable it:
Disable the XP_CMDSHELL feature:
EXEC sp_configure 'xp_cmdshell', 0;
Update the currently configured values
RECONFIGURE
GO;
Re-Check the current settings:
Sp_configure;
Configure Kerberos SPN
A Kerberos SPN should be configured on the server to allow the usage of Kerberos authentication.
On the SQL server, launch a command prompt as administrator.
Step 1: Checks if SPN have been correctly created.
Step 2: Allows to create them if they are missing.
Checking the SPNs:
If the installation was performed with the registration of the service account, SPN entries will automatically be created for that account.
Check that the SPN has been correctly registered for the service account with the command.
Setspn -L (Domain_name\SQL Service account);
The 2 SPN should be listed.
If the SPNs are not listed, the following steps allow to register them. This might happen for example if the installation was performed with local account and the services get switched to using the service accounts afterwards (see Security and Server hardening).
Create new SPN
Execute the following command replacing the brackets with appropriate fields for this installation:
Setspn –S MSSQLSvc/[Server]:1433 your_domain\[SQL Service account];
Setspn –S MSSQLSvc/[Server FQDN]:1433 your_domain\[SQL Service account];
For example
Setspn -S MSSQLSvc/your_servername:1433 your_domain\your_serviceaccount;
Note: The “-S” parameter first checks if the SPN already exists before creating it, it is more secure than the –A parameter. Note that the SPN Service class is “MSSQLSvc” and not “SQLSvc”
For clustered installation, Execute the same Setspn command for all nodes of the cluster. (Provide the Node FQDN in the command.)
Eg:
Setspn -S MSSQLSvc/your_full_servername_with_domain:1433 your_domain/your_serviceaccount;
In case an error is displayed when generating these SPNs, check step 4 for resolution.
SPN Verification:
From a remote server attempt a connection to the new SQL server from SSMS.
In case a SSPI error is presented, the issue is probably that the SQL service SPN has been registered under the computer account and not under the SQL service account.
Resolution
On the SQL server, check:
SETSPN -L Servername;
SETSPN -L Domain_name\SQLSERVICEACCOUNT;
Make sure the MSSQLSV is only registered under the name of the SQL SERVICE ACCOUNT.
If it is also defined under the SQL COMPUTER account, this is an error – it can be removed with this command:
setspn -D MSSQLSvc/ServerName.domain:1433 ServerName;
Also remove the non-1433:
setspn -D MSSQLSvc/ServerName.domain ServerName;
Post-Installation configuration
SQL Best Practices
Set Max Database Engine memory
If not already done during setup, review the settings for the Max memory.
You have SQL Server database engine installed on a system with other services such as Analysis Services, Reporting Services and/ or Integration Services the system may run out of memory and should be limited.
By default, the Max Server Memory (MB) setting is set to 2147483647.
In SQL Server 2022, the Max Memory setting dictates how much SQL Server (buffer pool + everything else) can use).
Best practice suggests setting this value to 80% of physical memory on a server that only has the database engine running. You will need to use smaller percentage if the server is sharing resources with other services. Please note this 80% rule is flexible as systems with larger amounts of memory you can increase that percentage. (How to migrate SQL Server 2019 to 2022?)
E.g.: on A system with 16GB of RAM, set the value to 12 GB of memory.
Typically, on an SQL instance running on WS2022 and with only the DB engine installed, leave at least 4GB for the OS.
Verify default drives for Data and logs.
In SSMS, in right click the SQL server > properties.
In the Database Settings section.
Verify the default path for the DATA, LOGS and Backup files.
Make sure they are on different drives and data and logs go to data and log dedicated drives.
Ensure the folder structure respects DBMS standards and that none of them are configured to target the root of a drive.
Adapt level of logging.
SQL Server logs can become quite polluted with valid entries which are not always necessary in healthy environments.
The Audited events can be modified to reduce this number of logs.
Since SQL Server 2022 the Login auditing is updated with the ‘Failed Logins only’ option. (How to migrate SQL Server 2019 to 2022?)
Setup Maintenance plans for Index and integrity
Correctly designed indexes are key for SQL Server database performance. It is important to maintain them periodically. Therefore, properly organized and regularly scheduled index maintenance operations play a crucial role in improving database performance.
Optional: Setup db Mail service
Enable the Database Mail feature
Database mail must first be activated on the server. (Disabled by default).
In SSMS, go to Management > right click Database Mail.
Choose the option to Configure Database Mail
Click Next on the welcome screen, then select the last Option “View or change system parameters”.
A pop-up window will appear asking to Enable the Database Mail feature. Click Yes.
Creation of the DBA Operator and Default alerts
Once db mail has been configured, the DBA operator (Operator name can be set as per your requirement) role can be added.
Configure DBA operator.
In SSMS, go to SQL Server Agent > Operators.
Create a new operator called “DBA” and enable it.
Add your dba team DL and leave other fields blank as per your standard process.
Click ok to create the operator.
Enable Mail profile for SQL Server Agent
On instances that will have jobs with email notifications, a profile must be configured as default to send those emails.
Typically, we will use the default server profile to send out the emails and the DBA operator defined as a fail-safe.
Right click on the SQL Server Agent > Properties.
In the “Alert System” section, enable a mail profile and choose your server Mail Profile.
Optionally, also enable the ‘Fail-Safe’ operator.
(An alert email will be sent to this operator if the designated operator of a notification cannot be reached.) (How to migrate SQL Server 2019 to 2022?)
Configure SQL Backups
Setup the SQL Backups as per your requirements.
Additional Software to Install – SQL Search (Redgate)
SQL Search is a free addition to SSMS that enhances the search features.
It should never be installed on the SQL server themselves (high memory impact), but it can be deployed on the Terminal servers used by dba.
Obtain the latest version of SQL Search from the RedGate website:
https://www.red-gate.com/products/sql-search/installer/
Install the addon on the remote server that already has SSMS installed to avoid the memory usage on you SQL Server 2022.
What is the difference between MySQL and SQL Server 2022?
| Feature | MySQL | SQL Server 2022 |
|---|---|---|
| Vendor | Oracle | Microsoft |
| Licensing | Open Source (GPL) | Commercial (with free editions) |
| Platform Support | Cross-platform | Primarily Windows, some Linux support |
| Features | Lightweight, ideal for web apps | Enterprise-grade, BI & analytics support |
| Performance Tools | Limited | Advanced tuning, performance insights |
MySQL is often preferred for open-source projects, while SQL Server is chosen for enterprise applications requiring deep integration with Microsoft services.
Summary: Key Takeaways for Migrating to SQL Server 2022
Migrating from SQL Server 2019 to SQL Server 2022 offers improved performance, enhanced security features, and better scalability for modern workloads. This guide has walked you through all critical stages—from pre-installation checks and configuration steps to post-installation best practices—ensuring your upgrade is smooth and aligned with industry standards.
By following this structured approach, you can minimize downtime, maintain data integrity, and leverage the full power of SQL Server 2022. Whether you’re handling a standalone installation or preparing for enterprise-level deployment, these migration steps will help you stay on track and compliant with Microsoft’s best practices.
Ready to take your database infrastructure to the next level? Use this guide to streamline your upgrade process and unlock the full capabilities of SQL Server 2022 today.
FAQ: How to migrate SQL Server 2019 to 2022?
1. How long is SQL Server 2022 supported?
SQL Server 2022 follows Microsoft’s Modern Lifecycle Policy. It includes:
Mainstream Support: Ends on January 11, 2028
Extended Support: Ends on January 8, 2033
During this time, Microsoft provides updates, security fixes, and support services.
2. Where can I buy SQL Server 2022?
You can purchase SQL Server 2022 through:
Microsoft Volume Licensing Service Center (VLSC)
Authorized Microsoft resellers or partners
Microsoft Azure portal (for cloud-based deployment)
Online retailers (for certain editions like Developer or Standard)
Ensure you’re buying from trusted sources to avoid licensing issues.
3. Can SQL Server 2022 run on Windows Server 2019?
Yes, SQL Server 2022 is compatible with Windows Server 2019. However, using the latest version of Windows Server (like Windows Server 2022) is recommended for the best performance and full feature support.
4. What is the difference between SQL Server 2019 and 2022?
SQL Server 2022 introduces several improvements over 2019, including:
Better Azure integration (e.g., Azure Synapse Link, Managed Instance link)
Built-in Query Intelligence enhancements
Security upgrades, including Ledger for tamper-evidence
Improved performance features like intelligent query processing v2
5. Is there an offline installer for SQL Server 2022?
Yes, an offline installer (ISO or CAB file) for SQL Server 2022 is available. You can:
Download it from the official Microsoft Download Center
Choose the “Download Media” option during setup to get the full installer
6. How do we migrate from SQL Server 2019 to 2022?
You can upgrade SQL Server 2019 to 2022 using the in-place upgrade or side-by-side migration approach:
In-Place Upgrade: Use the SQL Server 2022 installation wizard and select the upgrade option.
Side-by-Side Migration: Install SQL Server 2022 on a new instance/server
Use tools like Database Migration Assistant (DMA) or Backup/Restore to move databases
Test thoroughly before switching over
Ensure you have full database backups and test your environment prior to migration.